FL Studio 11 tutorial explaining sidechaining.
Sidechaining is the technique where one sound is used to affect another. A very common application is to sidechain a compressor or gate in order to avoid that multiple sounds in the same frequency range clash, for instance the kick drum and bassline. As such sidechaining is not new, but the exaggerated effect has become quite popular in Dance music - the characteristic pumping sound is achieved with this technique.
In this tutorial I will discuss the options you have in FL Studio.
Fruity Peak Controller
The Fruity Peak controller generates an automation signal based on an input sound. This automation signal can be used to automate virtually any other control, but a very common application is the sidechaining compression effect.
To illustrate the sidechaining effect using the Fruity Peak Controller I use the following simple setup:
As you can see, I have added a kick drum and created a bassline. When I play this, the bass and the kick clash. This affects my kick - it is less punchy than I want it to be.
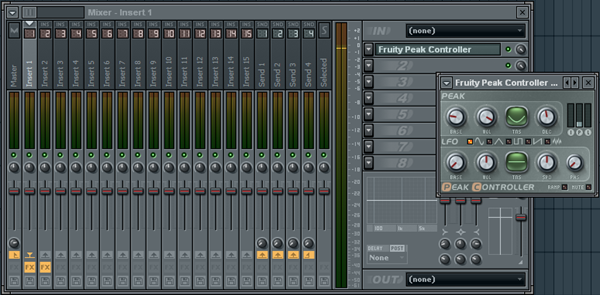
Next, I route my channel with the Kick to Insert channel 1 in the Mixer and add the Fruity Peak Controller to the first FX slot. See below:
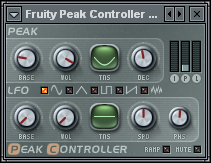
With the Fruity Peak Controller you can control the automation signal via the controls in the Peak section and the LFO section. With the former you can control how the input signal maps to the automation signal. The controls are (and I quote):
- Base wheel (BASE) - Sets the base value (offset) of the peak controller.
- Volume wheel (VOL) - This wheel sets how the volume peaks affect the peak controller. The value you can set ranges from -200% (maximum to left) to 200% (maximum to right). When using positive values for this setting, higher volume means higher value for the peak controller. Negative values result in the opposite effect.
- Tension (TNS) - Drag up and down to alter the shape of the curve used to map the volume peaks to peak controller values. You can think for this parameter as peak's "tension".
- Decay wheel (DEC) - Turn to right for faster decay of the peak. Turn to left for slower decay.
The LFO section allows you to apply an LFO (low frequency oscillator) to the automation signal, but this is not essential for our sidechaining effect, so we will not bother with that. Make sure, however, to switch off the Mute switch (lower right corner).
Note also the three meters in the upper right corner, labelled I(nput), P(eak) and L(fo). These show you the levels of the input signal, the automation signal and the LFO respectively.
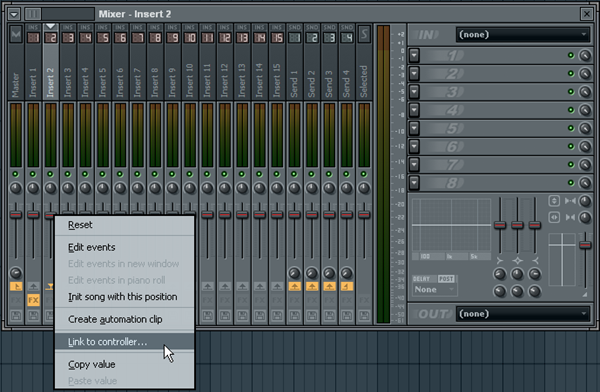
Ok, let’s move on. What I do next is route my channel with the bassline to Insert track 2 in the Mixer, right click the level fader and choose Link to controller. See below:
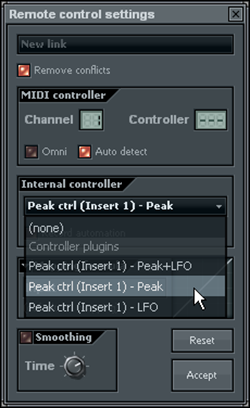
In the Internal controller menu I choose Peak ctrl (Insert 1) – Peak. See below:
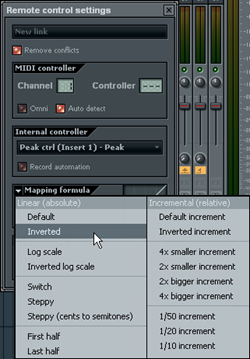
As you can see, the Fruity Peak Controller signal(s) are now available for automation purposes. In the Mapping formula menu I choose Inverted. See below:
Click Accept and voila, you have automated the volume of bassline based on the volume level of the kick! Note that you may need to tweek the Peak controls a bit (in the Fruity Peak Controller) before you get the desired effect. However, pretty soon you will discover how cool this sidechaining effect is. The kick has room to breathe and the song gets this nice, characteristic trance groove.
Fruity Limiter
The Fruity Limiter (in FL Studio 9) has a sidechain compressor feature. As before, I will start with the same two channels. One for the kick and one for the bassline.
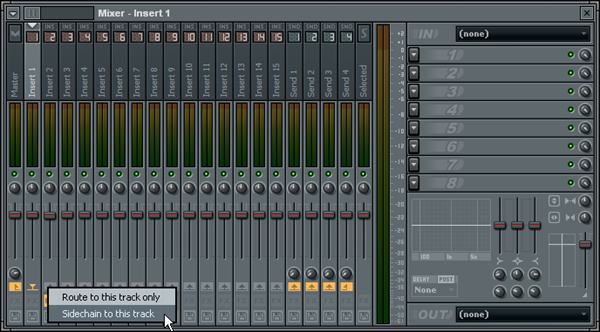
The channel with the kick is still routed to Insert track 1 in the Mixer, but I’ve removed the Fruity Peak Controller from the previous section. But what I do is select Insert track 1 and then right click the Enable send switch (the gray arrow above the FX switch) of Insert track 2 and choose Sidechain to this track. See below:
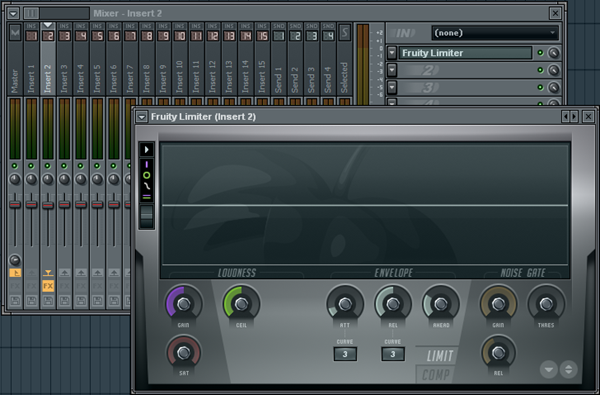
What this does is route the sound from Insert track 1 to Insert track 2 as a sidechain signal. Next, I select Insert track 2 and add the Fruity Limiter to the first FX slot. See below:
Make sure to select COMP(ressor) as the target. See below:
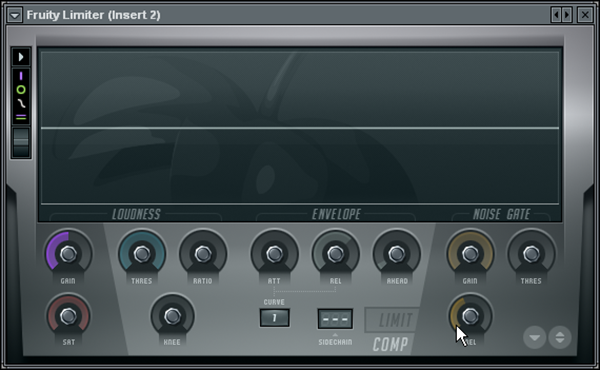
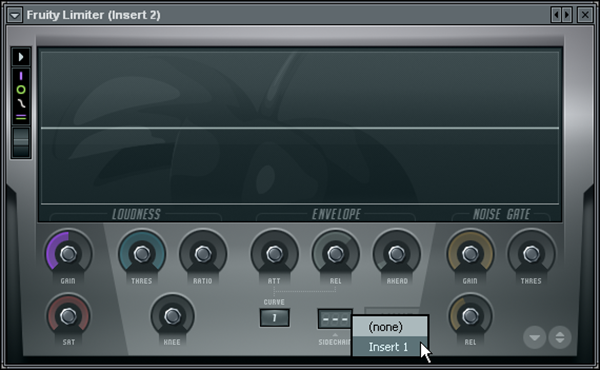
As you can see, at the bottom of the plugin is a selector labelled Sidechain. I right click it and select Insert 1 as the sidechain source:
Note that you can sidechain as many Insert tracks to the Insert track containing the Fruity Limiter, you can only select one as the sidechain source.
What the above means is that the signal from the kick (Insert track 1) now functions as the input envelope rather than the signal of the bassline (remember to route that channel to Insert track 2). In other words, if the volume level of the kick exceeds the threshold, the compressor kicks in and compresses the sound….of the bassline.
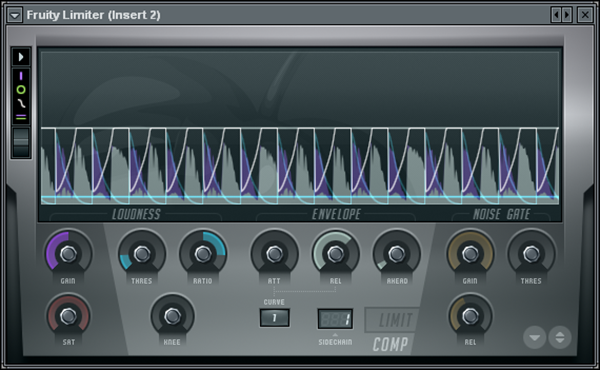
In the screenshot below you can see the sidechaining in action:
The bassline sound is compressed only when the kick sounds! Take note of the Thres(hold) and Ratio as well as the Att(ack) and Rel(ease) controls. The sidechaining effect depends on what you do with these knobs ;)


No comments:
Post a Comment